How to create and share online quizzes and assessments with Google Forms
Google Forms are a great way to build and share sophisticated online quizzes and assessments that will help your students and streamline the way you process assessment data.
You can choose from different question types, build questions around video, set questions to auto-mark and provide feedback. You get to see the responses to your quiz/assessment in a nice graphical summary that makes it easy to analyse the overall impact of your quiz and individual student performance.
So how do you get started with a simple quiz?
Step 1 - Go to Google Forms and sign in
Create a new Google account if you don't already have one.
Step 2 - Start a new form from the Google Forms homepage
One way to do that is to take a look at some of the template forms. Click 'Template Gallery' at top right. There's already an assessment template. Click and open that and get a feel for what you can do. Just edit the template if you don't want to create a blank quiz from scratch.
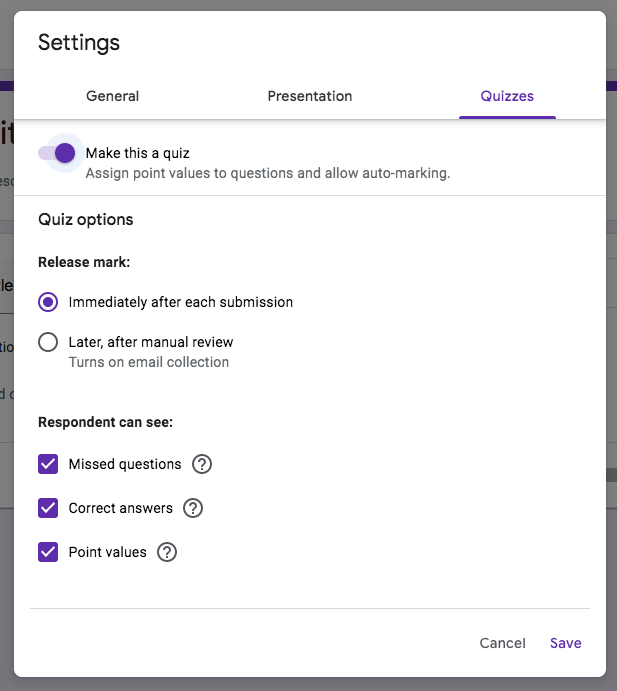
Alternatively, create a blank form from Forms homepage. There's an extra step if you do it this way - click the 'Settings' cog at the top right and select the 'Quizzes' tab. The switch on 'Make this a quiz'.
Step 3 - Start adding questions
Adding the questions and building the quiz is straightforward. Use the floating menu to the right to add new questions. You also change the question type - short answer, multiple choice, dropdown etc.
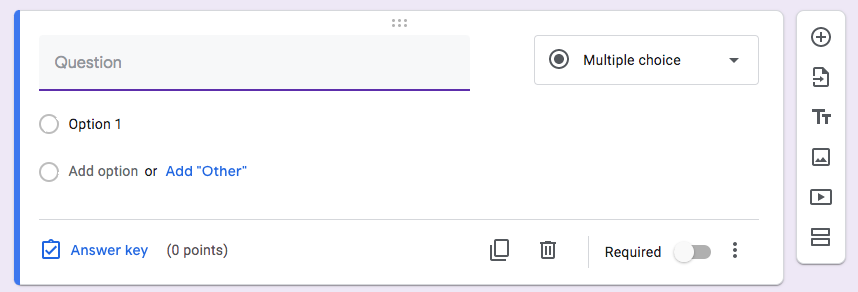
You need to think about marking and scoring when you add a new question. Click 'Answer key' and then set the overall point score for the question and indicate which answers are correct.
Step 4 - Get clever with video and file uploads
There are two other things worth mentioning at this point.
First, you can add video (from YouTube) into the assessment. That means you can really move beyond simple multiple choice questions to something that is more sophisticated - students watch some video and then answer questions that develop and test their understanding.
Second, you can add a file upload box. So now you can ask students to submit other material - an essay or a photograph of a piece of work or some other document. Again, with a little effort and a bit of imagination you can turn your Google Form into something more than just a simple quiz.
Step 5 - Start using the quiz
Share the quiz with your students.
::: {style="text-align:left;margin-top:30px;"} Loading... :::
Another great thing about Google Forms is that you can do the sharing in different ways. You can send the form in an email, or can use a link to share it on social media or embed the quiz in a web page. That last option is great if you want to build some assessment into an existing online course.
The email option works if all your students have an email address.
Google Forms is a bit of a hidden gem. The tools are easy to use and you can do more than just create quizzes and assessments. The templates include 'Event Registration' and 'Course Evaluation'.
Related Posts
Use Facebook Ads to Increase Course Bookings - 5 Easy Steps
Marketing ideas for small training providers that will increase your course bookings